DIY Kitchen Island: Guide to Boost Your Space
Starting a DIY kitchen island project is like embarking on a thrilling adventure. It’s a chance to mix your creativity with practical skills. This project goes beyond adding space for work and storage; it’s about making your kitchen a more welcoming and effective space. Whether you love cooking, hosting gatherings, or just want to enhance your kitchen’s look and functionality, building a kitchen island can be a fulfilling experience.
Planning Your Kitchen Island
The journey to creating your ideal kitchen island begins with thoughtful planning. Consider the kitchen size, your storage needs, and how you intend to use the island. Will it be a prep area, a dining spot, or both? Envisioning its role will guide your design choices, from dimensions to features like a built-in sink or shelves.
Materials and Tools
Selecting the right materials is crucial for both the look and longevity of your kitchen island. For a sturdy and customizable option, consider using a combination of solid wood for the structure and a high-quality countertop material such as granite, butcher block, or stainless steel. As for tools, you’ll need a saw, drill, screws, brackets, and sandpaper, among others. Don’t forget safety gear, including goggles and gloves.
Building the Base
The foundation of your kitchen island is its base, which provides stability and defines its overall structure. You can start by constructing a simple frame using 2x4s or opt for a more complex design with additional compartments for storage. Accuracy in measuring and cutting is key to ensuring that the base is level and secure.
Adding the Countertop
Choosing the right countertop for your DIY kitchen island depends on your aesthetic preferences and functionality needs. If you’re looking for durability and ease of maintenance, butcher block or granite might be your best bet. Secure the countertop to the base using brackets or adhesive, ensuring it’s perfectly aligned and stable.
Customizing Your Island
This is where you get to inject your personality and meet your specific needs. Add drawers, shelves, or cabinets for storage, and consider installing a pull-out bin or a rack for hanging utensils. If you’re aiming for a dining area, ensure there’s enough legroom beneath the countertop for stools or chairs.
Finishing Touches
The final step in your DIY kitchen island project is applying the finishing touches. Sand any rough edges, paint or stain the wood to match your kitchen’s decor, and add hardware like drawer pulls or towel bars. These details not only enhance the island’s functionality but also its appeal.
Maintenance and Care
To keep your DIY kitchen island looking its best, regular maintenance is essential. Clean the surface after use, especially if it’s wood, to prevent staining and water damage. Apply a sealant or oil to the countertop periodically to protect it from wear and tear.
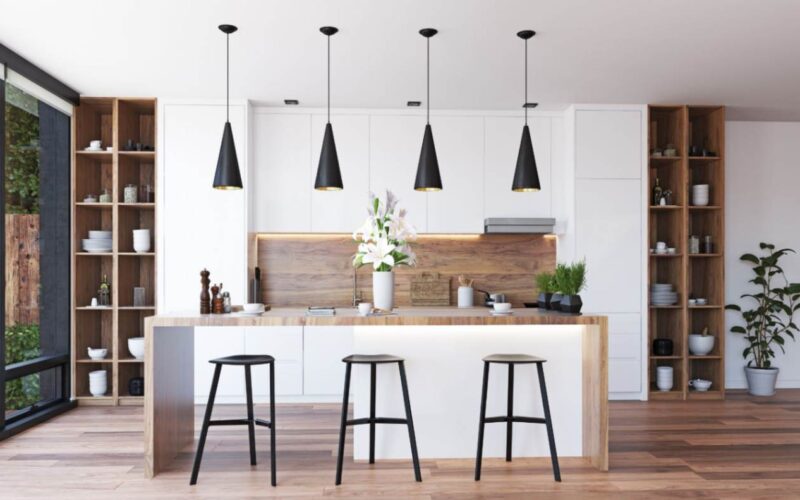
Enhancing Your Kitchen’s Ambiance with Lighting
One aspect that can dramatically elevate your DIY kitchen island is the addition of strategic lighting. Imagine pendant lights hanging low over the island, not only illuminating your workspace but also creating a cozy ambiance for evening gatherings. You can opt for modern LED strips underneath the countertop for a subtle glow or classic spotlight fixtures to highlight your island’s features. Lighting is not just functional; it’s a style statement that can change the mood and perceived size of your kitchen.
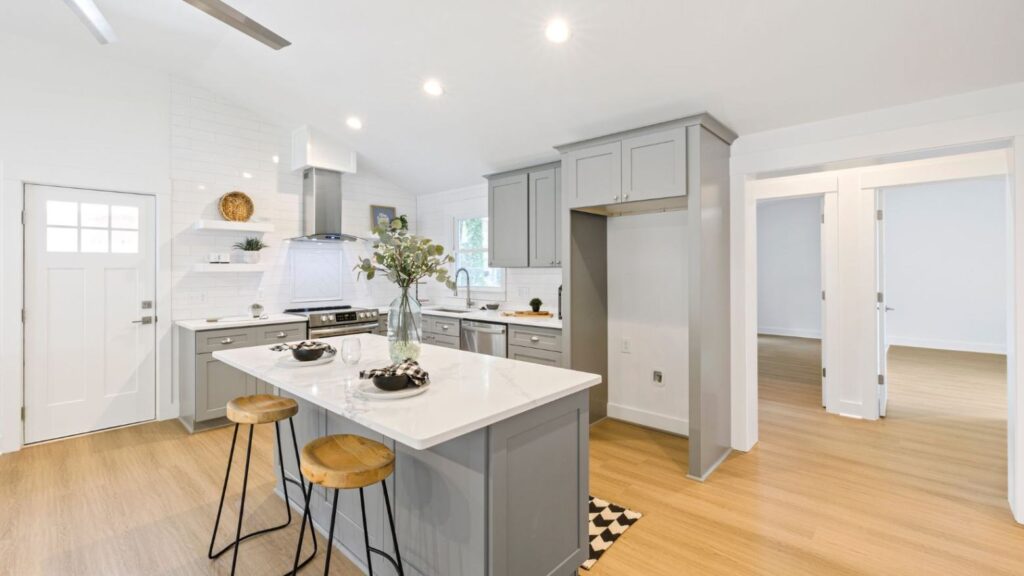
Incorporating Seating Solutions
If your kitchen island doubles as a dining area, the choice of seating can significantly impact both comfort and style. Bar stools or chairs that complement your kitchen’s decor can turn the island into a favorite spot for breakfast or casual meals. Consider adjustable height stools for versatility or cushioned seats for added comfort. The key is to ensure that seating is not only stylish but also practical, offering enough legroom and support for everyone in the family.
Organizational Hacks for Your Island
Efficient storage solutions can transform your kitchen island into a powerhouse of organization. Consider installing sliding drawers with dividers for utensils, spices, or even plates. This keeps everything within easy reach yet out of sight. Pull-out trash and recycling bins integrated into the island can save space and keep the kitchen tidy. For those who love to entertain, a built-in wine rack or a space for storing large platters and bowls can be a game-changer.
The Power of a Multipurpose Island
Your DIY kitchen island can serve multiple functions with a bit of ingenuity. By incorporating a fold-down leaf on one side, you can create additional dining or prep space that tucks away when not in use. Installing wheels on the base of your island can turn it into a movable feast. This allows you to adjust your kitchen layout as needed or bring the island closer to guests during parties.
Eco-Friendly Materials and Practices
Choosing sustainable materials for your kitchen island is eco-friendly. You can use reclaimed wood, bamboo, or recycled metal. Also, pick low-VOC paints and finishes to keep indoor air quality high. This makes your DIY project beautiful and good for the planet.
Wrapping Up
Embarking on a DIY kitchen island project opens up a world of possibilities. Creating a DIY kitchen island allows you to customize your kitchen based on your lifestyle needs. You can add extra cooking space, create a gathering spot for family, or showcase your design preferences. To achieve this, think about the lighting, seating options, storage solutions, and materials you use. These elements can help you design an island that is both practical and a representation of your personal style.
Remember, the beauty of a DIY project lies in the journey as much as the outcome. Each choice, from the materials to the finishes, tells a story of creativity and craftsmanship. Your DIY kitchen island isn’t just a piece of furniture; it’s a central part of your home’s story, infused with your unique touch.